Disable Windows Ink
Windows Ink Causing Input Issues
In some applications such as Unreal Engine (UE5), Photoshop, Blender, or other creative tools, Windows Ink can interfere with mouse input.
Common symptoms include:
- Mouse cursor turning into a crosshair (+)
- Erratic or inaccurate mouse movement
- Issues with camera controls in game engines
- Brush/tool behaving incorrectly in design software
Understanding the Issue
Windows Ink Workspace is a feature designed for pen and touch input (stylus, drawing, handwriting).
However, many professional applications rely on raw mouse input, and Windows Ink can override or interfere with this input system.
This conflict is especially noticeable in:
- Game engines (UE5, Unity)
- Creative tools (Photoshop, ZBrush, Blender)
- Remote/virtual workstations (like Spark Workstations)

If you experience cursor issues, crosshair pointer, or input lag, disabling Windows Ink is recommended.
When Should You Disable Windows Ink?
Disable Windows Ink if:
- You are not using a stylus or pen device
- You experience cursor/input issues
- You are working with:
- 3D tools
- Game engines
- Design or editing software
- Remote workstations
Solution 1: Disable via Group Policy (Recommended)
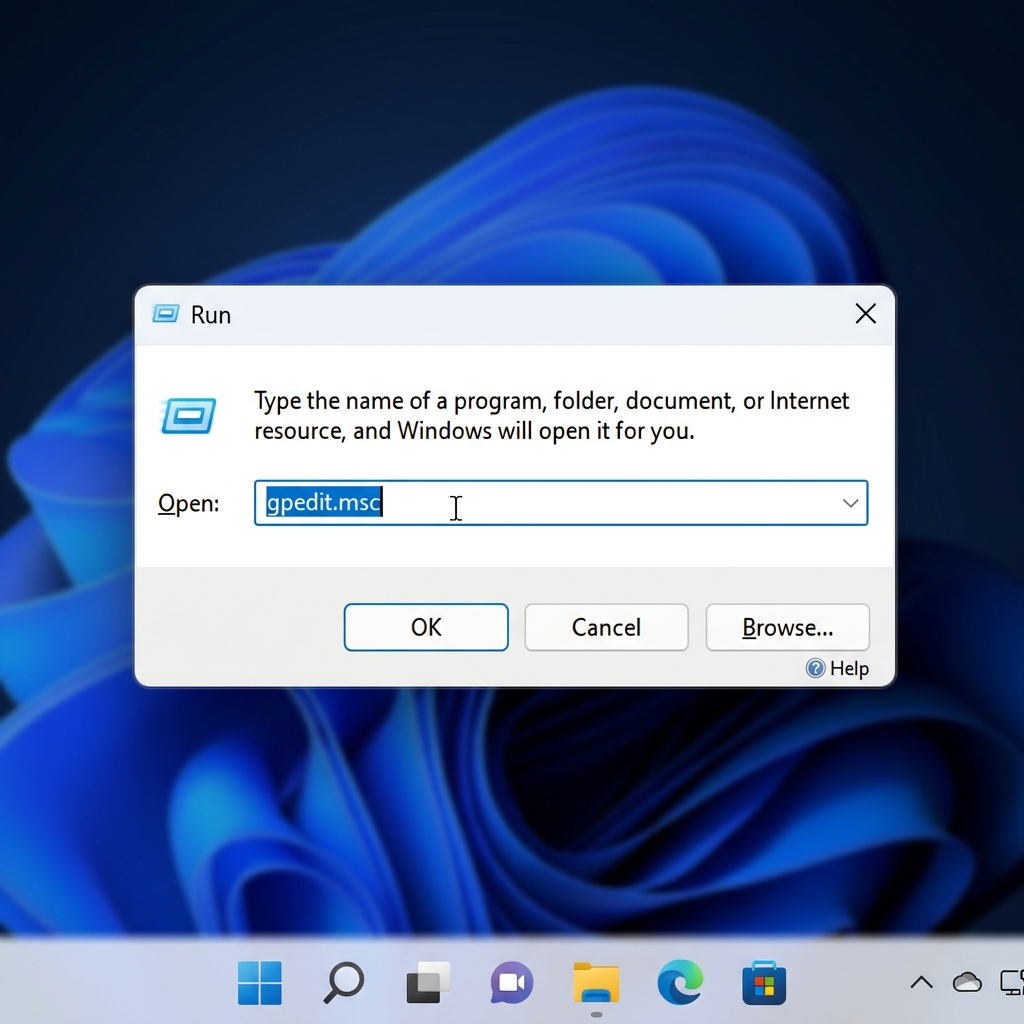
- Press Win + R
- Type
gpedit.mscand press Enter
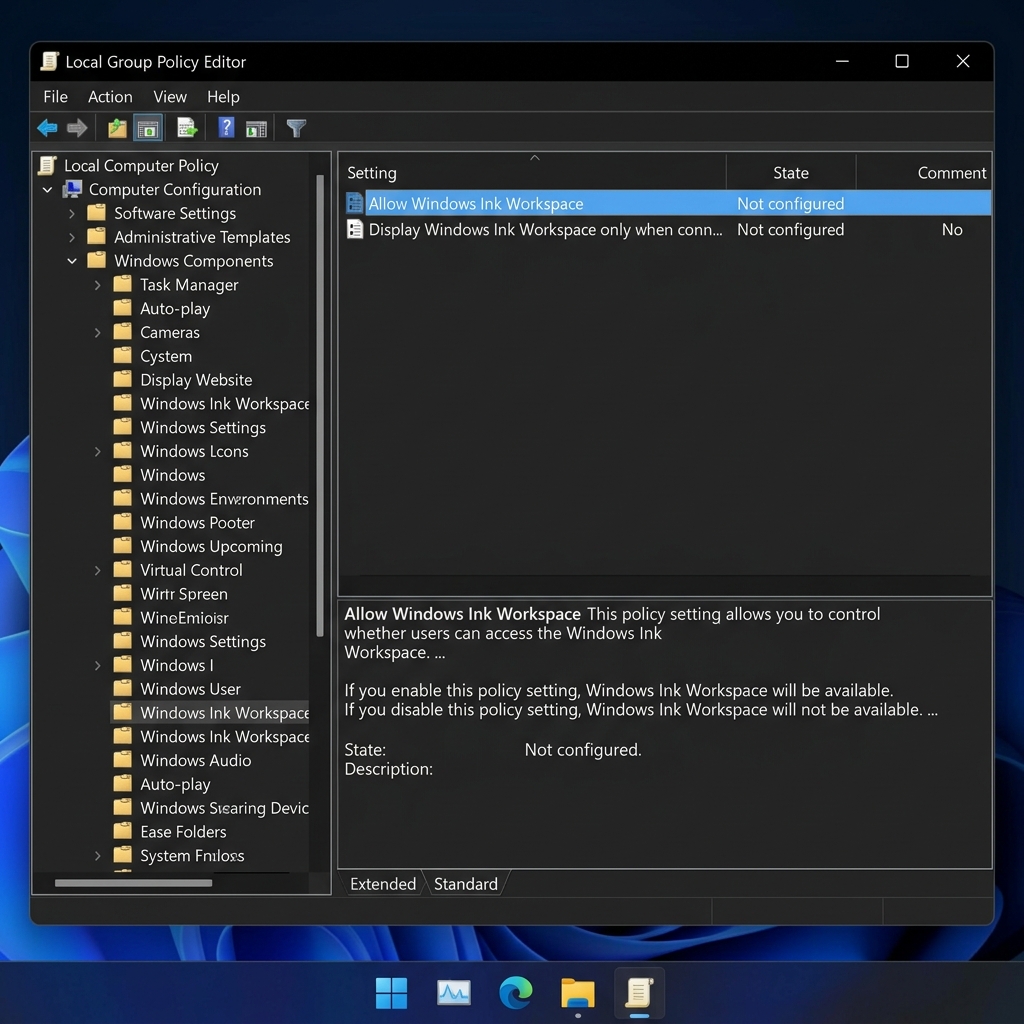
- Go to: Computer Configuration > Administrative Templates > Windows Components > Windows Ink Workspace
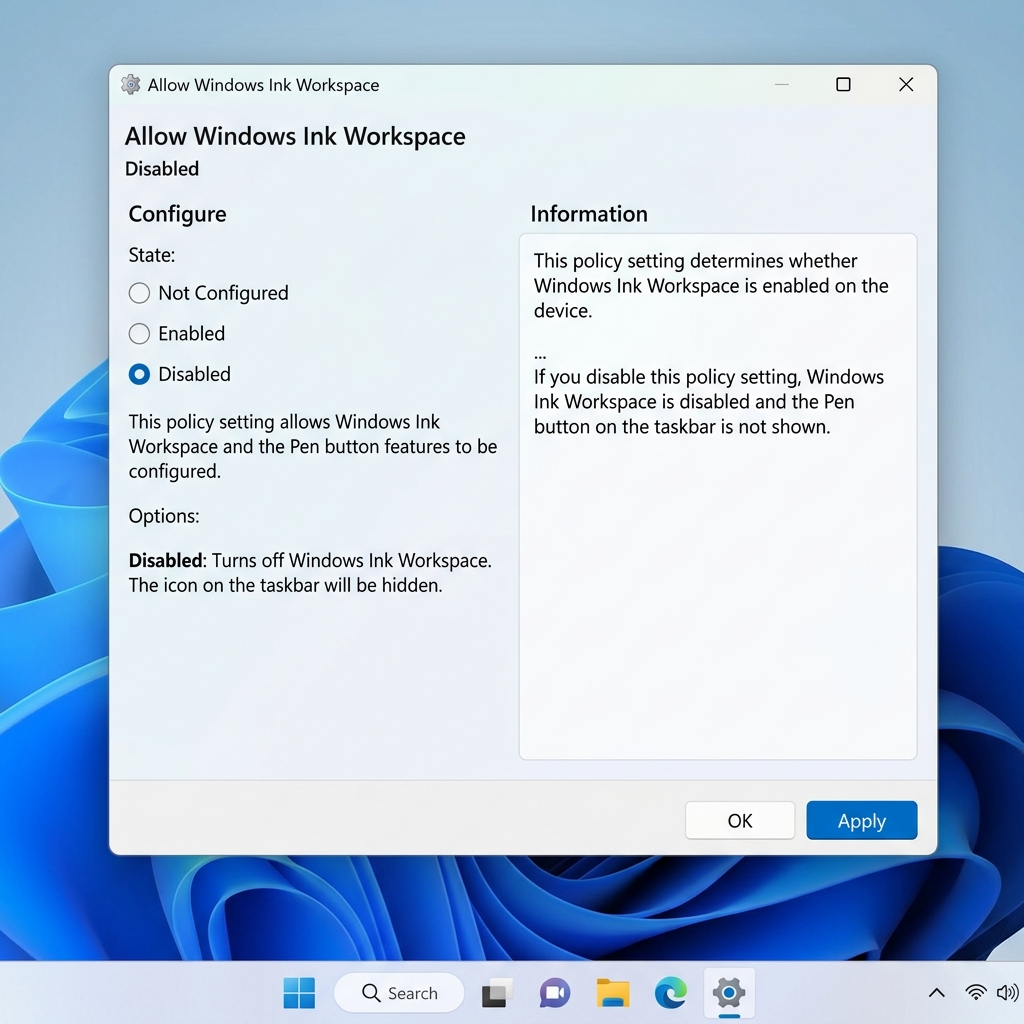
- Double-click Allow Windows Ink Workspace
- Select Enabled
- Then choose Disabled in the Options section
- Click Apply → OK
- Restart your workstation for changes to take effect
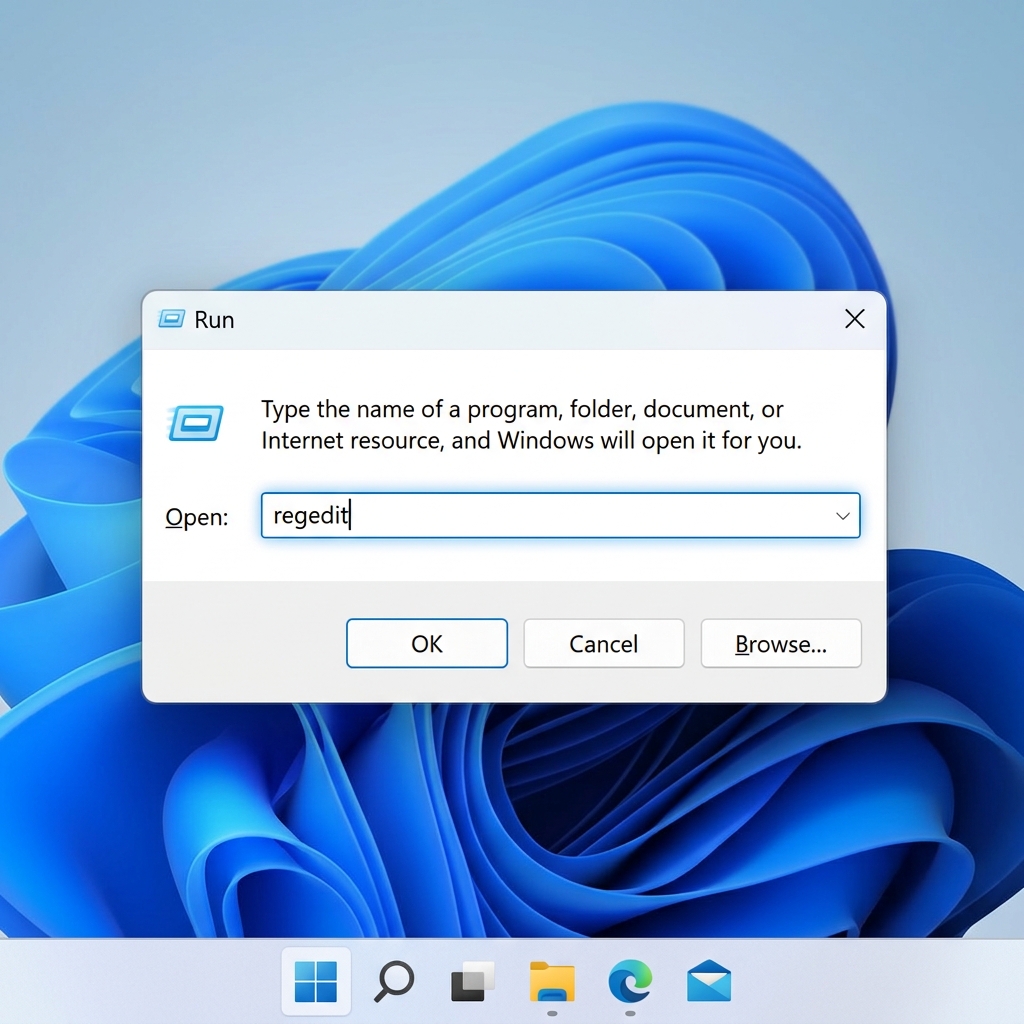
Solution 2: Disable via Registry (Alternative Method)
- Press Win + R
- Type
regeditand press Enter
- Go to:
HKEY_LOCAL_MACHINE\SOFTWARE\Policies\Microsoft
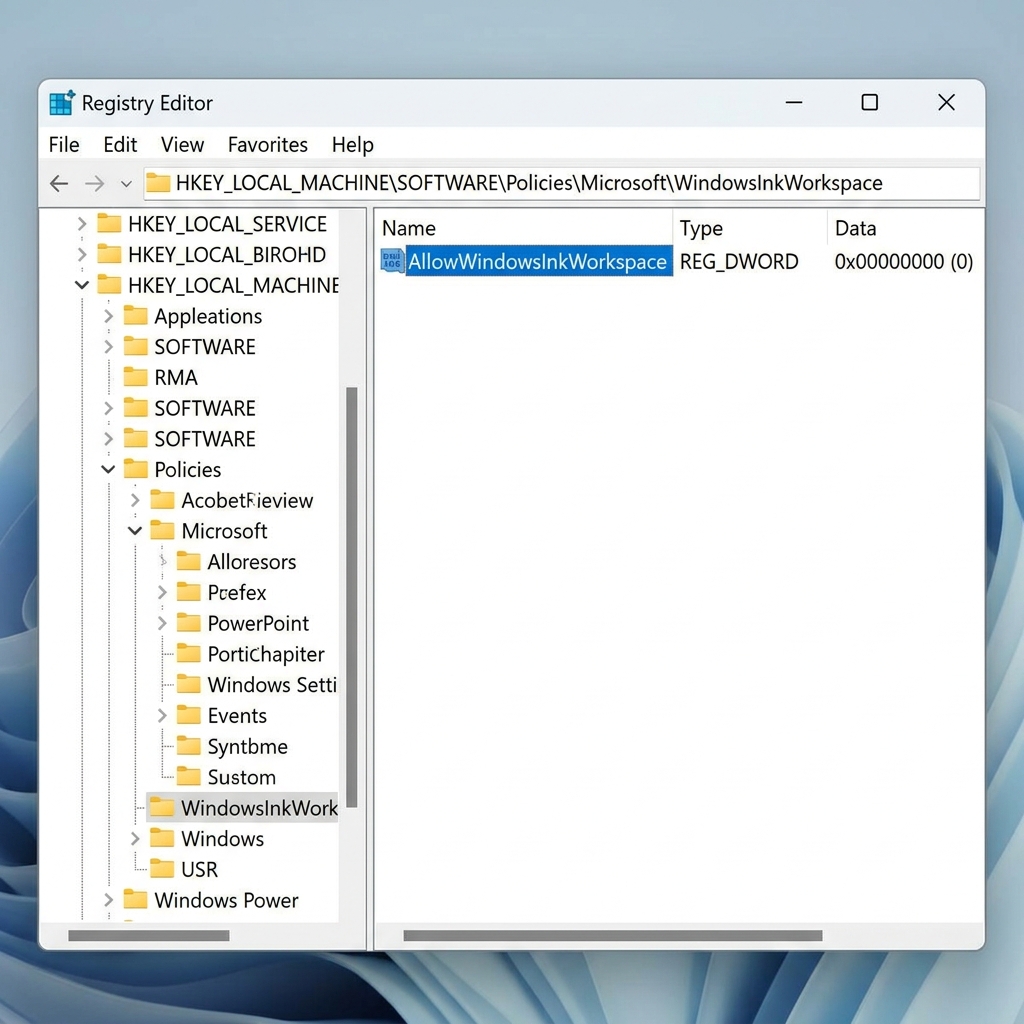
- Right-click Microsoft
- Select New → Key
- Name it:
WindowsInkWorkspace
- Right-click in right pane → New → DWORD (32-bit)
- Name it:
AllowWindowsInkWorkspace - Set value to 0
- Restart your workstation
Re-enable Windows Ink (Optional)
If you need Windows Ink again:
- Change value to 1 in registry
- Or set Group Policy to Enabled
Additional Notes

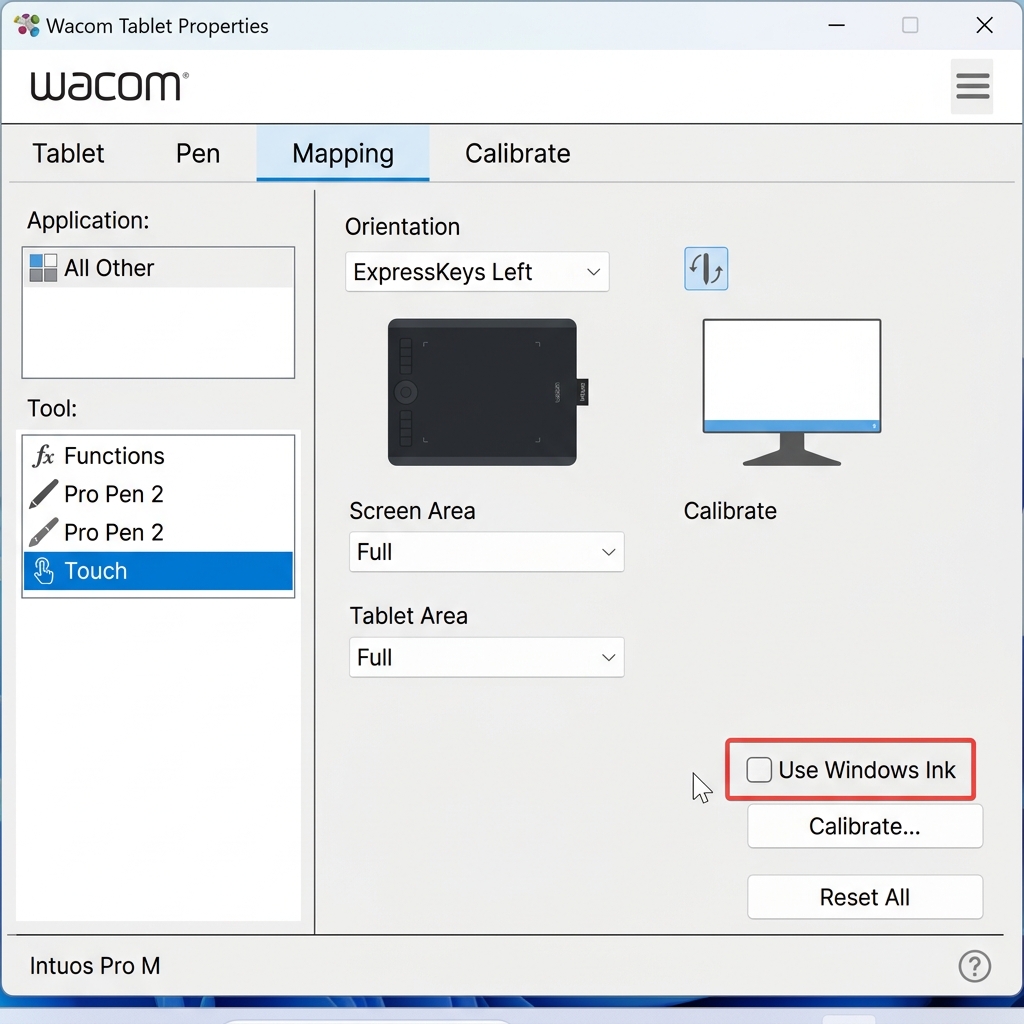
If you are using devices like Wacom tablets, Windows Ink behavior may be controlled separately by device drivers or software. Ensure "Use Windows Ink" is unchecked in your tablet settings.